Turn Prototypes into Production Apps 20x Cheaper: AutoBE + Qwen 3.5 + OpenRouter Setup Guide

In the rapidly evolving landscape of AI-powered development, the ability to rapidly prototype and then seamlessly transition those prototypes into robust, production-ready applications is a game-changer. Traditional methods often involve significant manual coding, leading to higher costs, longer development cycles, and increased potential for errors. However, with the advent of advanced AI agents like AutoBE, combined with powerful Large Language Models (LLMs) such as Qwen 3.5 via OpenRouter, developers can now achieve unprecedented efficiency and cost savings.
This comprehensive guide will walk you through the complete setup of AutoBE leveraging Qwen 3.5-27B through OpenRouter. This powerful combination allows you to generate backend services, database schemas, API specifications, and even end-to-end tests with remarkable speed and accuracy. The cost-effectiveness of using Qwen 3.5 via OpenRouter, often proving 20 times cheaper than alternatives like OpenAI’s Codex or Anthropic’s Claude for similar tasks, makes this a compelling solution for both individual developers and enterprises looking to optimize their development workflows.
By following these steps, you’ll be able to transform high-level requirements into functional codebases, dramatically reducing the time and expense associated with traditional software development. This guide covers everything from system requirements and API key generation to detailed configuration, programmatic usage, and troubleshooting, ensuring you have all the tools and knowledge to harness the full potential of this cutting-edge stack.
Table of Contents
- 1. System Requirements
- 2. OpenRouter Account and API Key
- 3. Installing AutoBE from Source
- 4. Configuring Qwen 3.5 via OpenRouter
- 5. Running the Playground
- 6. Programmatic Usage (Agent Library)
- 7. VS Code Development Environment
- 8. Verifying the Installation
- 9. Troubleshooting
- 10. Deep Dive: AutoBE Architecture and Workflow
- 11. Qwen 3.5 Capabilities and Optimizations for Code Generation
- 12. OpenRouter: Benefits, Cost Analysis, and Alternatives
- 13. Advanced Use Cases and Industry Implications
- 14. Security and Best Practices for AI-Generated Code
- 15. Future Outlook and Evolution of AI-Powered Backend Generation
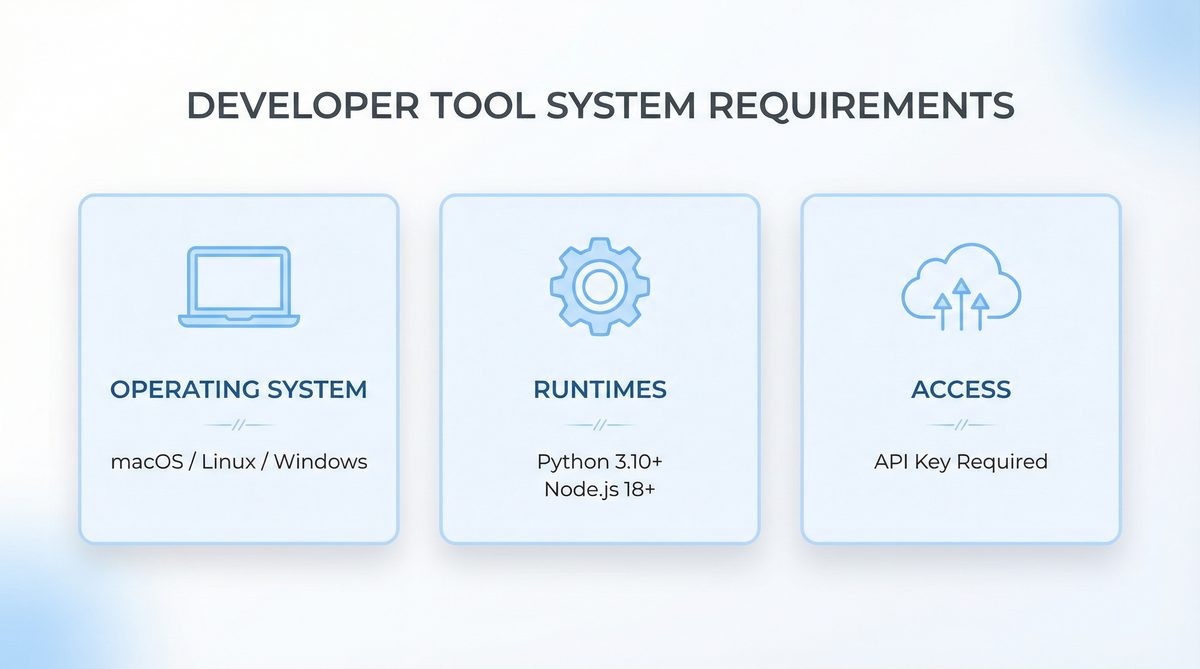
1. System Requirements
Before diving into the installation process, it’s crucial to ensure your development environment meets the necessary prerequisites. Adhering to these system requirements will prevent common installation issues and ensure a smooth experience with AutoBE and its dependencies. The following table outlines the minimum and recommended specifications for your development machine.
| Requirement | Minimum Version | Notes |
|---|---|---|
| Node.js | v18.0+ | v20 LTS recommended for optimal performance and stability. Node.js is the runtime environment for AutoBE, which is built using TypeScript and JavaScript. The latest LTS versions often include performance improvements and critical security updates that enhance the overall development experience. Ensure your Node.js installation is correctly configured in your system’s PATH. |
| pnpm | v8.0+ | The preferred package manager for the AutoBE monorepo due to its efficiency in managing dependencies and disk space. pnpm creates symlinks to a global content-addressable store, meaning dependencies are installed only once on your system, saving significant disk space and speeding up installation times across multiple projects. If you’re working with multiple AI-powered tools or microservices, this efficiency becomes even more pronounced. |
| Git | v2.30+ | Essential for cloning the AutoBE repository from GitHub. Git is fundamental for version control and collaborating on codebases. Ensure you have a recent version for optimal compatibility with GitHub and any potential submodules within the AutoBE repository. Basic Git commands like clone, pull, and commit will be frequently used. |
| VS Code | Latest stable | Recommended Integrated Development Environment (IDE) for its robust TypeScript support and extensive extension ecosystem. VS Code offers excellent integration with Node.js, pnpm, and Git, providing a seamless development experience. Extensions for ESLint, Prettier, Docker, and specific language support (e.g., Python, Go, Java, depending on your generated backend language) will further enhance productivity. Consider installing the “Remote – WSL” extension if you’re on Windows. |
| Operating System | macOS, Linux, or Windows (WSL2) | While native Windows might work, using Windows Subsystem for Linux (WSL2) is highly recommended to avoid potential pathing and environmental issues common in Windows development. Many open-source tools and build processes are optimized for Unix-like environments. WSL2 provides a full Linux kernel, allowing for better performance and compatibility. For macOS and Linux, ensure your system is up-to-date. |
| RAM | 8GB+ | Compiler operations and running the LLM locally (if applicable, though here we use OpenRouter) can be memory-intensive. 16GB is ideal for complex projects, especially when running multiple services (e.g., a database, a generated backend, and AutoBE itself) concurrently. If you plan to scale up to larger generated projects or explore local LLM alternatives in the future, 32GB+ would be beneficial. |
| Disk Space | 2GB+ | Required for project dependencies, the AutoBE codebase, and generated project files. This can increase significantly with larger generated applications. Modern SSDs are highly recommended for faster compilation times and overall system responsiveness. Consider having at least 20-50GB of free space for comfortable development, especially if you’re generating large, multi-service applications. |
If you do not have pnpm installed, you can install it globally using npm:
npm install -g pnpm
This command will make the pnpm command available system-wide, allowing you to manage packages efficiently within the AutoBE monorepo. After installation, it’s good practice to verify the version by running pnpm -v.
For Windows users, setting up WSL2 is a critical step for a smooth experience. You can find detailed instructions on Microsoft’s documentation. Once WSL2 is enabled, you can install a Linux distribution like Ubuntu and perform all subsequent setup steps within the WSL2 terminal. This provides a robust and performant environment that closely mirrors Linux development.
2. OpenRouter Account and API Key
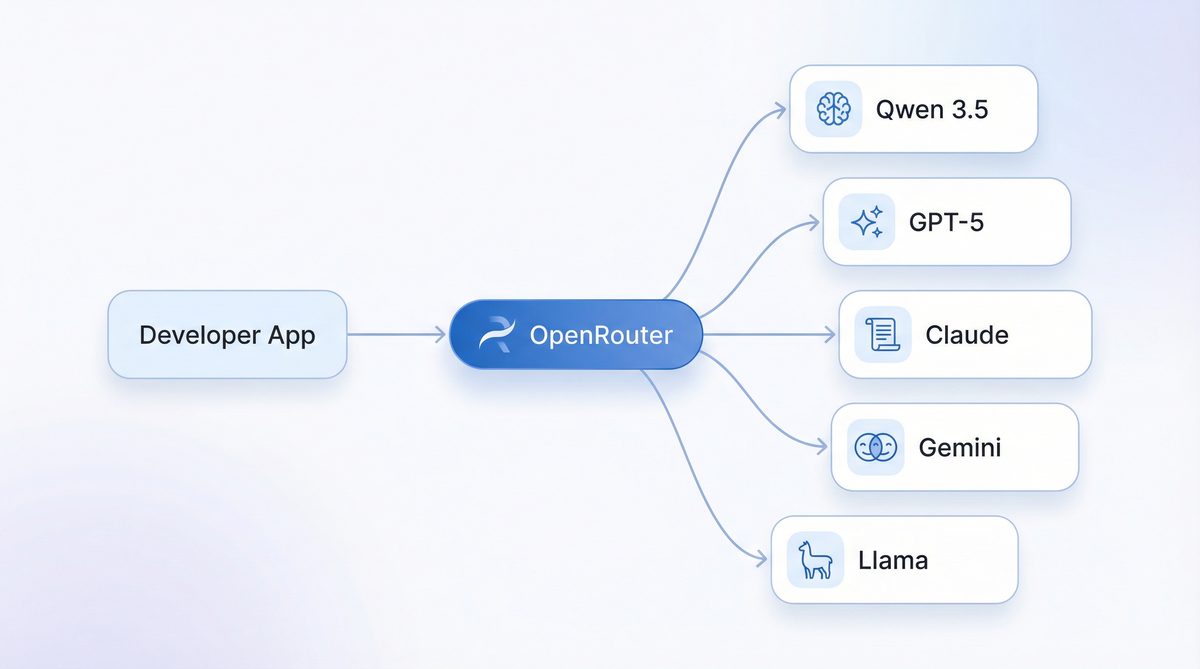
OpenRouter acts as a crucial intermediary, providing a unified API gateway that simplifies access to a multitude of Large Language Models, including the powerful Qwen 3.5 from Alibaba Cloud. By using OpenRouter, you benefit from a single endpoint and API key, reducing complexity and often offering competitive pricing. This section details the steps to set up your OpenRouter account and obtain the necessary API key.
Step 2.1: Create an OpenRouter Account
- Navigate to the OpenRouter website: https://openrouter.ai. The user interface is designed for simplicity, making the signup process straightforward.
- Click on the Sign Up button, typically located in the top right corner. You’ll be presented with options for registration.
- You can choose to create an account using your email address or by authenticating with your GitHub account. Using GitHub can streamline the process, especially if you already manage development projects with it. Follow the on-screen prompts to complete the registration, which usually involves email verification.
- Once registered and logged in, you will typically be redirected to your dashboard. This dashboard provides an overview of your usage, models, and settings. From there, navigate to the Settings section, and then select API Keys. This is your central hub for managing programmatic access to OpenRouter’s services.
Step 2.2: Generate an API Key
- On the API Keys page, click the Create Key button. OpenRouter allows you to create multiple API keys for different projects or environments, enhancing security and organization.
- You will be prompted to give your new API key a descriptive name. This is helpful for organizing multiple keys if you use OpenRouter for various projects. A name like
autobe-qwen-devis recommended for this setup, clearly indicating its purpose. Good naming conventions prevent confusion and facilitate key rotation. - Upon creation, your API key will be displayed. It will follow a format similar to:
sk-or-v1-xxxxxxxxxxxxxxxxxxxx. It is critical to copy this key immediately, as it may not be fully retrievable again for security reasons. OpenRouter follows standard security practices where API keys are shown only once upon creation. If you lose it, you’ll need to generate a new one. - Store this API key securely. This means avoiding hardcoding it directly into your source code. Instead, you will need to add it to your AutoBE project’s
.envfile in a later step, following best practices for environment variable management.
Step 2.3: Add Credits
To use the LLMs available through OpenRouter, you will need to add credits to your account. OpenRouter operates on a pay-as-you-go model, similar to many cloud providers, offering flexibility and cost control.
- Navigate to Settings > Credits on your OpenRouter dashboard. Here you will see your current balance and options to top up.
- Add a minimum of $5-$10 in credits. This amount should be sufficient for initial testing and several generations, depending on the complexity of your projects. For more intensive development or larger projects, consider adding a higher amount to avoid interruptions. OpenRouter supports various payment methods, usually including credit cards.
- Understanding Qwen 3.5-27B Pricing: It’s important to be aware of the approximate costs for using Qwen 3.5-27B via OpenRouter. These prices are subject to change but provide a general idea of the cost-effectiveness:
- Input Tokens: Approximately $0.195 – $0.30 per 1 million tokens. This refers to the tokens you send to the model (your prompts, instructions, context).
- Output Tokens: Approximately $1.56 – $2.40 per 1 million tokens. This refers to the tokens the model generates in response (the code, explanations, API specifications).
Compared to other high-end models, Qwen 3.5 offers a highly competitive price point, making it an excellent choice for budget-conscious development. For instance, generating a complex backend with several hundred lines of code might consume a few tens of thousands of tokens, resulting in costs measured in cents, not dollars. This affordability is a key advantage of the AutoBE + Qwen 3.5 + OpenRouter combination.
Step 2.4: Verify Qwen 3.5 Availability
Before proceeding, it’s good practice to confirm that Qwen 3.5-27B is available and actively supported on OpenRouter. Model availability can sometimes change, or new versions might be introduced.
- Visit the specific model page on OpenRouter: https://openrouter.ai/qwen/qwen3.5-27b. This page provides details about the model, its capabilities, and current pricing.
- Ensure that the model is listed and shows active providers. This confirms that OpenRouter can route your requests to Qwen 3.5. If it’s not available, you might need to select an alternative model or check for updates on OpenRouter’s status page.
- Note down the exact model ID:
qwen/qwen3.5-27b. This is the identifier you will use in your AutoBE configuration to explicitly tell AutoBE which LLM to leverage through the OpenRouter gateway. Precision here is key to avoid configuration errors.
3. Installing AutoBE from Source

Installing AutoBE directly from its source code provides the most flexibility, allowing you to access the latest features, bug fixes, and even contribute to its development. This section guides you through cloning the repository, installing dependencies, and building the project.
Step 3.1: Clone the AutoBE Repository
First, open your terminal or command prompt (preferably within your WSL2 environment if on Windows) and navigate to your desired development directory. Then, clone the AutoBE GitHub repository:
git clone https://github.com/autobe/autobe.git
cd autobe
This command downloads the entire AutoBE codebase to your local machine and then changes your current directory into the newly created autobe folder. It’s crucial to ensure you have Git installed and configured correctly before this step.
Step 3.2: Install Dependencies
AutoBE is a monorepo, meaning it contains multiple interdependent packages within a single repository. pnpm is particularly efficient for managing such structures. From the root of the autobe directory, run:
pnpm install
This command will read the pnpm-lock.yaml file and the various package.json files within the monorepo’s subdirectories (e.g., packages/agent, packages/cli, packages/playground) to install all necessary packages. This includes core libraries, development dependencies, and peer dependencies. Depending on your internet connection and system speed, this step might take a few minutes. You should see output indicating packages being fetched and linked.
Step 3.3: Build the Project
After installing dependencies, you need to build the TypeScript source code into executable JavaScript. AutoBE typically uses a build script defined in its root package.json.
pnpm build
This command compiles all TypeScript files across the monorepo. It transpiles TypeScript into JavaScript, generates declaration files (.d.ts) for type checking, and might bundle modules. Successful completion of this step is indicated by no error messages and a return to your command prompt. If you encounter errors here, double-check your Node.js and TypeScript versions, as well as any specific compiler requirements mentioned in the AutoBE documentation.
At this point, AutoBE’s core components are installed and compiled. The next step involves configuring it to use Qwen 3.5 via OpenRouter.
4. Configuring Qwen 3.5 via OpenRouter

With AutoBE installed, the next critical step is to configure it to communicate with Qwen 3.5-27B through the OpenRouter API. This involves setting environment variables and potentially modifying AutoBE’s configuration files.
Step 4.1: Create a .env File
In the root directory of your cloned AutoBE repository, create a new file named .env. This file will store your sensitive API keys and configuration settings, keeping them out of your version control system (it should be listed in .gitignore by default).
OPENROUTER_API_KEY="sk-or-v1-YOUR_OPENROUTER_API_KEY"
OPENROUTER_MODEL="qwen/qwen3.5-27b"
Replace "sk-or-v1-YOUR_OPENROUTER_API_KEY" with the actual API key you generated from OpenRouter in Step 2.2. The OPENROUTER_MODEL variable specifies the exact model identifier for Qwen 3.5-27B, ensuring AutoBE targets the correct LLM. This explicit model declaration is important, as OpenRouter supports many different models.
It’s also good practice to include a fallback or default model if you wish, though for this specific setup, qwen/qwen3.5-27b is our target. AutoBE’s internal logic will pick up these environment variables when it initializes its LLM client.
Step 4.2: Verify Configuration
While AutoBE will load these variables at runtime, it’s often useful to perform a quick check to ensure they are accessible. You can add a temporary script to the package.json or run a simple Node.js command to log the environment variables. For example, create a file named check_env.js in the root with:
require('dotenv').config(); // Make sure dotenv is installed if not already
console.log('OpenRouter API Key (first 5 chars):', process.env.OPENROUTER_API_KEY ? process.env.OPENROUTER_API_KEY.substring(0,5) + '...' : 'Not set');
console.log('OpenRouter Model:', process.env.OPENROUTER_MODEL || 'Not set');
Then run node check_env.js. This helps confirm your .env file is correctly parsed.
Step 4.3: AutoBE’s Internal LLM Provider Configuration
AutoBE is designed with a flexible architecture that allows it to integrate with various LLM providers. Internally, it likely uses an abstraction layer that can switch between OpenAI, Anthropic, OpenRouter, or even local models. When you set OPENROUTER_API_KEY and OPENROUTER_MODEL, AutoBE’s agent library will detect these variables and instantiate its LLM client to use OpenRouter as the backend. This typically involves configuring an HTTP client to send requests to https://openrouter.ai/api/v1/chat/completions with the appropriate headers (including your API key) and payload (including the model name, messages, and generation parameters).
The prompt engineering within AutoBE is specifically crafted to elicit structured code, database schemas, and API definitions from LLMs. Qwen 3.5, with its strong coding capabilities and large context window, is particularly well-suited for these types of tasks. The system prompts and few-shot examples used by AutoBE guide Qwen 3.5 to produce accurate and syntactically correct output in languages like TypeScript, Python, Go, or Java, depending on the desired backend stack.
This configuration effectively bridges AutoBE’s intelligent orchestration capabilities with Qwen 3.5’s generative power, all while leveraging OpenRouter’s cost-efficiency and unified access.
5. Running the Playground

The AutoBE playground is an interactive web interface that allows you to experiment with different prompts and observe the generated backend code in real-time. It’s an excellent way to understand AutoBE’s capabilities and fine-tune your input requirements.
Step 5.1: Start the Playground Application
From the root of your AutoBE directory, execute the following command:
pnpm run playground
This command typically starts a development server for the playground application. You should see output indicating that the server is running, usually on http://localhost:3000 or a similar port. Open your web browser and navigate to the specified URL.
The playground usually presents a simple UI: an input area for your high-level requirements (e.g., “Create a user management system with authentication and a PostgreSQL database”), a button to trigger generation, and an output area to display the generated code, file structure, and potentially a log of the LLM interactions.
Step 5.2: Generate Your First Backend
- In the playground’s input field, enter a simple request. For example: “Generate a REST API for a blog platform with posts, comments, and user authentication using Node.js, Express, and MongoDB.”
- Click the “Generate” or “Run” button.
- Observe the output. You should see AutoBE interacting with Qwen 3.5 via OpenRouter. This typically involves:
- Initial Planning: AutoBE breaks down your request into smaller, manageable tasks (e.g., define data models, design API endpoints, create authentication flows).
- LLM Calls: For each task, AutoBE sends specific prompts to Qwen 3.5, requesting code snippets, schema definitions, or configuration files.
- Code Synthesis: AutoBE then assembles these generated pieces into a coherent project structure.
- Review the generated files. The playground often provides a file tree view and code editors to inspect the generated code. Look for:
- Database schemas (e.g., Mongoose schemas for MongoDB, SQL DDL for PostgreSQL).
- API routes (e.g., Express routes, FastAPI endpoints).
- Authentication logic (e.g., JWT implementation).
- Basic CRUD operations for your entities.
- Configuration files (e.g.,
.env.example, database connection settings). - Potentially even Dockerfiles or deployment scripts.
Step 5.3: Iteration and Refinement
The playground is ideal for rapid iteration. If the initial output isn’t exactly what you need, refine your prompt. Be more specific with:
- Technologies: “Use TypeScript, NestJS, and TypeORM with PostgreSQL.”
- Features: “Add role-based access control (RBAC) with ‘admin’ and ‘user’ roles.”
- Constraints: “Ensure all API endpoints are authenticated. Include basic validation for input data.”
- File Structure: “Organize the project into
src/controllers,src/services,src/models.”
Each iteration will help you understand how AutoBE interprets your requests and how Qwen 3.5 generates code based on those interpretations. This interactive feedback loop is invaluable for learning to leverage the system effectively.
For development teams looking to integrate AI coding tools into their workflows, understanding the iterative process in a playground environment is crucial. This approach aligns well with modern agile development practices. To learn more about how other organizations are successfully integrating AI coding assistants, you might find our article How Development Teams Are Adopting AI Coding Assistants in 2026: Codex and Claude Code in Production particularly insightful. It explores real-world adoption strategies and best practices for leveraging AI in development pipelines.
6. Programmatic Usage (Agent Library)
While the playground is great for experimentation, true power comes from integrating AutoBE’s agent library directly into your development scripts or CI/CD pipelines. This allows for automated backend generation based on dynamic inputs or pre-defined specifications.
Step 6.1: Understanding the AutoBE Agent Library
The core of AutoBE is its agent library, typically found within packages/agent in the monorepo. This library exposes functions and classes that encapsulate the logic for:
- Prompt Orchestration: Constructing complex prompts for the LLM based on user requirements.
- LLM Interaction: Making API calls to OpenRouter (or other providers) and handling responses.
- Code Generation & Synthesis: Parsing LLM output, validating it, and structuring it into a coherent codebase.
- File System Operations: Writing the generated files to disk.
You’ll primarily interact with a high-level function or class that takes a specification (e.g., a string description, a YAML file, or a structured object) and returns the generated project structure or writes it directly to a specified output directory.
Step 6.2: Example Script for Programmatic Generation
Let’s create a simple Node.js script that uses the AutoBE agent library. First, ensure you have a .env file configured as described in Section 4.
Create a new file, say generate_backend.js, in the root of your AutoBE project (or in a dedicated scripts folder):
require('dotenv').config(); // Ensure environment variables are loaded
const { AutoBEAgent } = require('./packages/agent/dist/index'); // Adjust path if necessary

async function generateBackend() {
    const agent = new AutoBEAgent({
        llmProvider: 'openrouter', // Explicitly specify OpenRouter
        openRouterApiKey: process.env.OPENROUTER_API_KEY,
        openRouterModel: process.env.OPENROUTER_MODEL,
        // Other configuration options as needed
        // e.g., outputDirectory: './generated-project',
        // targetLanguage: 'typescript',
        // targetFramework: 'nestjs',
    });

    const projectDescription = `
        Create a simple e-commerce backend.
        It should manage products (name, description, price, stock), users (email, password, roles), and orders.
        Orders should link users and products, include quantity and status.
        Use Python with FastAPI, SQLAlchemy, and PostgreSQL.
        Implement basic CRUD operations for all entities.
        Include user registration and login with JWT authentication.
        Ensure proper error handling and validation.
    `;

    console.log('Starting backend generation...');
    try {
        const generatedProject = await agent.generate(projectDescription);
        console.log('Backend generated successfully!');
        console.log('Project structure:', generatedProject.fileStructure);
        // You can then save these files to disk
        // await agent.saveProject(generatedProject, './my-ecommerce-backend');
        console.log('Check the generated files in your specified output directory.');
    } catch (error) {
        console.error('Error generating backend:', error);
        if (error.response) {
            console.error('LLM API Error Response:', error.response.data);
        }
    }
}

generateBackend();
To run this script:
node generate_backend.js
This script demonstrates how to instantiate the AutoBEAgent, provide your requirements, and trigger the generation process. The generate method will return an object representing the generated project, which you can then inspect or save to disk. The specific API of the AutoBEAgent might vary slightly based on the AutoBE version, so always refer to the official documentation or the packages/agent/src/index.ts file for the most up-to-date interface.
Step 6.3: Advanced Programmatic Usage – Integrating with CI/CD
The true power of programmatic generation shines in automated workflows. Imagine a scenario where a product manager defines new microservice requirements in a structured YAML or JSON file. A CI/CD pipeline could:
- Trigger a script that reads this specification.
- Call the AutoBE agent library with the specification.
- Generate the new microservice’s boilerplate, API definitions, and database migrations.
- Automatically commit the generated code to a feature branch.
- Run initial tests on the generated code.
This significantly accelerates development, allowing engineers to focus on business logic rather than boilerplate. For instance, a new product feature requiring a dedicated backend service could have its foundational code generated in minutes, ready for developers to build upon. This paradigm shift, where AI generates significant portions of the codebase, is transforming how software is built. For a deep dive into how such tools are being adopted by leading companies, you can read our article on How AI Coding Tools Drove an 84% App Store Surge: A Vibe Coding Case Study, which illustrates the tangible impact of AI in accelerating app development and market entry.
7. VS Code Development Environment

Visual Studio Code (VS Code) is the recommended IDE for working with AutoBE, offering a rich set of features and extensions that enhance productivity, especially for TypeScript and JavaScript projects. Proper configuration of your VS Code environment can significantly streamline your development process.
Step 7.1: Essential VS Code Extensions
Install the following extensions for an optimal experience:
- ESLint: Integrates ESLint into VS Code, providing real-time feedback on code quality and style. AutoBE likely has its own ESLint configuration.
- Prettier – Code formatter: Automatically formats your code to adhere to a consistent style, making the generated code (and your own additions) easier to read and maintain.
- TypeScript and JavaScript Language Features: Built-in, but ensure it’s up-to-date. Provides intelligent code completion, type checking, and navigation.
- Docker: If your generated backends include Dockerfiles, this extension provides syntax highlighting, linting, and easy management of Docker containers.
- GitLens: Supercharges Git capabilities within VS Code, showing who, why, and when code lines were changed.
- DotEnv: Syntax highlighting for
.envfiles, making your environment variables more readable. - Remote – WSL (for Windows users): Allows you to open any folder in the Windows Subsystem for Linux (WSL) and get the full VS Code experience with all your extensions running directly in WSL. This is crucial for avoiding pathing issues and leveraging the Linux environment.
Step 7.2: VS Code Settings for AutoBE
Open your VS Code settings (Ctrl+, or Cmd+,) and consider these adjustments:
{
    "editor.formatOnSave": true,
    "editor.defaultFormatter": "esbenp.prettier-vscode",
    "eslint.validate": [
        "javascript",
        "typescript",
        "javascriptreact",
        "typescriptreact"
    ],
    "typescript.updateImportsOnFileMove.enabled": "always",
    "files.eol": "\n", // Ensure consistent line endings, especially important for cross-platform development
    "terminal.integrated.defaultProfile.windows": "WSL Bash", // If using WSL
    "workbench.editorAssociations": {
        "*.md": "vscode.markdown.preview.editor"
    }
}
These settings ensure consistent formatting, proper ESLint validation, and better integration with TypeScript features. The "terminal.integrated.defaultProfile.windows": "WSL Bash" is particularly useful for Windows users, as it automatically opens the integrated terminal within your WSL environment.
Step 7.3: Workspace Settings
For monorepos like AutoBE, it’s often beneficial to use workspace-specific settings. Create a .vscode directory at the root of your AutoBE project and add a settings.json file. This allows you to override global settings specifically for this project, ensuring consistency across contributors. For example, you might enforce a specific Node.js version using NVM or define project-specific ESLint rules.
// .vscode/settings.json
{
    "typescript.tsdk": "node_modules/typescript/lib", // Use the project's TypeScript version
    "eslint.workingDirectories": [
        { "mode": "auto" } // Auto-detect ESLint configs in monorepo packages
    ]
}
This setup provides a highly productive and consistent development environment for working with AutoBE and the code it generates.
8. Verifying the Installation
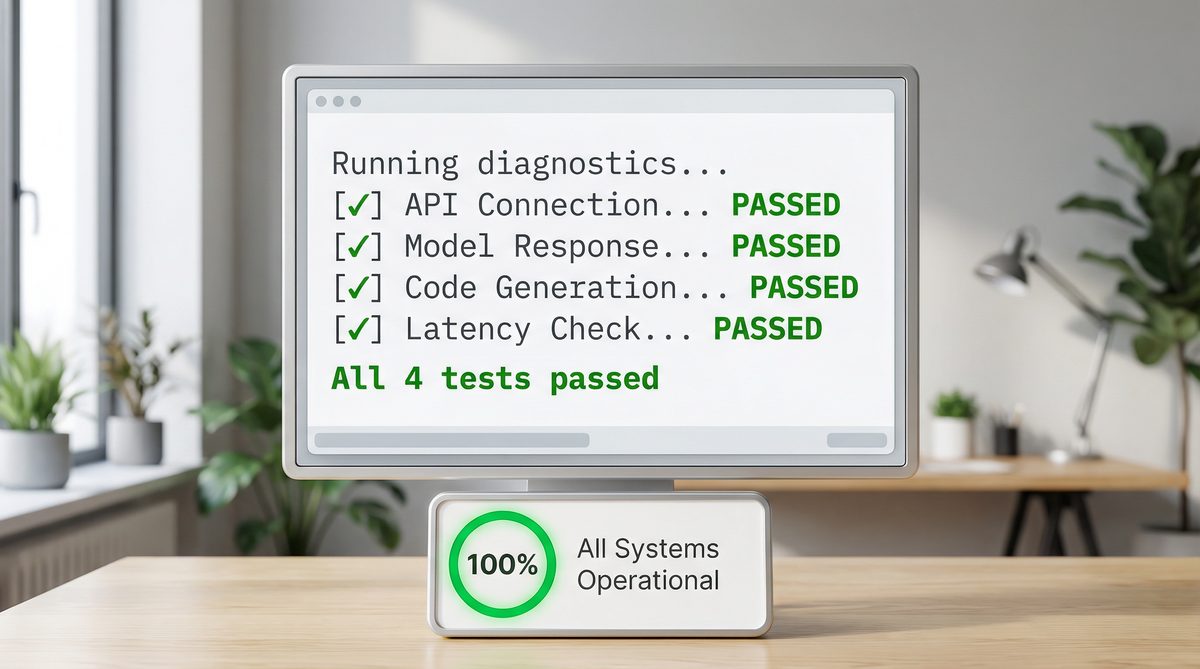
After completing all the setup steps, it’s crucial to verify that AutoBE is correctly installed, configured, and can successfully interact with Qwen 3.5 via OpenRouter. This step helps catch any environmental issues early.
Step 8.1: Run a Simple Generation via CLI (if available)
Many AI code generation tools provide a command-line interface (CLI) for quick testing. If AutoBE has a CLI (often found in packages/cli), you can try a basic generation command. Look for a pnpm cli generate or similar command in the package.json scripts.
Example (assuming a CLI exists):
pnpm cli generate "a simple user API with Node.js and Express" --outputDir ./test-api
Monitor the console output for any errors related to API key authentication, model availability, or network issues. A successful run will typically show progress messages and eventually indicate that files have been written to the specified output directory.
Step 8.2: Inspect Generated Code
Useful Links
Here are essential resources to help you get started and go deeper with AutoBE, Qwen 3, and OpenRouter:
- AutoBE GitHub Repository — Official source code, installation instructions, and documentation for AutoBE.
- OpenRouter — The unified API gateway for accessing Qwen 3.5, GPT-4.1, Claude, and 200+ other models.
- OpenRouter Model Directory — Compare pricing, context windows, and capabilities across all available models.
- Qwen Official Documentation — Technical documentation for the Qwen model family from Alibaba Cloud.
- Qwen Models on Hugging Face — Download and experiment with Qwen models locally.
- Visual Studio Code — The recommended IDE for AutoBE development workflows.
- ChatGPT AI Hub — Tutorials & Guides — More step-by-step AI development tutorials on our site.
- ChatGPT AI Hub — AI Tools — Discover and compare the latest AI tools and platforms.