Introduction to OpenAI Codex CLI: Unlocking AI-Powered Coding at Your Fingertips
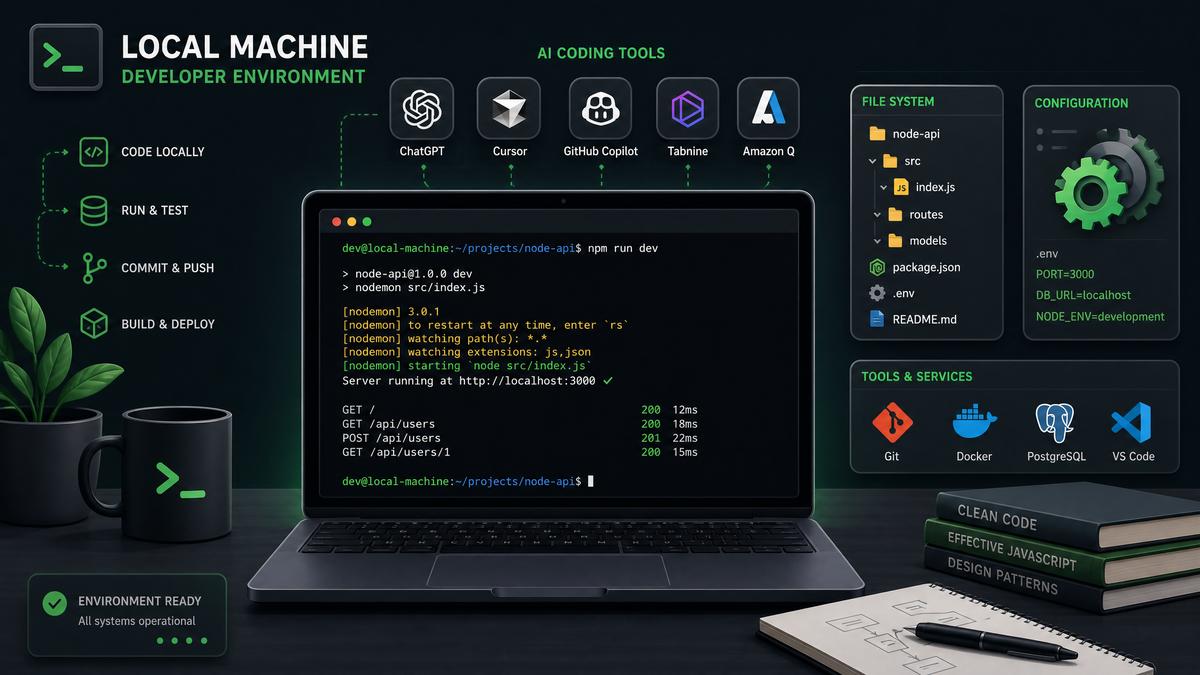
The OpenAI Codex CLI is an innovative open-source command-line interface that leverages the power of Codex, a specialized GPT model fine-tuned for programming and code generation. As of 2026, this tool empowers developers to automate coding tasks, generate code snippets, refactor legacy code, and interactively build projects—all from the terminal.
This tutorial provides a comprehensive, step-by-step walkthrough to install, configure, and master the Codex CLI on your local machine. Whether you prefer Node.js’s npm ecosystem or Rust’s Cargo package manager, this guide covers both installation methods, API key management, sandbox environment setup, and advanced features like memory persistence and SQLite integration.
By the end, you will have a fully operational Codex CLI environment tailored for efficient coding workflows, supported by diagnostic tools like codex doctor to ensure smooth operation.
Prerequisites: Setting the Foundation for Codex CLI
Before diving into installation and configuration, ensure your system meets the following prerequisites. Codex CLI relies on a modern runtime environment and connectivity to OpenAI’s API endpoint.
Supported Operating Systems
- Windows 10/11: Windows Subsystem for Linux (WSL) is recommended for Unix-like shell compatibility.
- macOS 12+: Native support with zsh/bash terminal.
- Linux: Ubuntu 20.04+, Fedora 35+, Debian 11+ recommended.
Runtime Dependencies
- Node.js: Version 18.x or higher (for npm installation).
- Rust Toolchain: Stable release 1.70+ (for Cargo installation).
- SQLite3: CLI tools and libraries (optional but required for persistent memory features).
- Git: For cloning repositories and version control integration.
Network and API Access
Codex CLI communicates with OpenAI’s API over HTTPS. Ensure your network allows outbound connections on port 443. You’ll also need an API key from your OpenAI dashboard with appropriate permissions to access Codex models.
Developer Tools
- Terminal emulator: iTerm2 (macOS), Windows Terminal, or your preferred shell.
- Code editor: VSCode, Neovim, or any editor that integrates well with the CLI.
Confirm your environment by running:
node -v
rustc --version
sqlite3 --version
git --version
Each command should return a version string without errors.
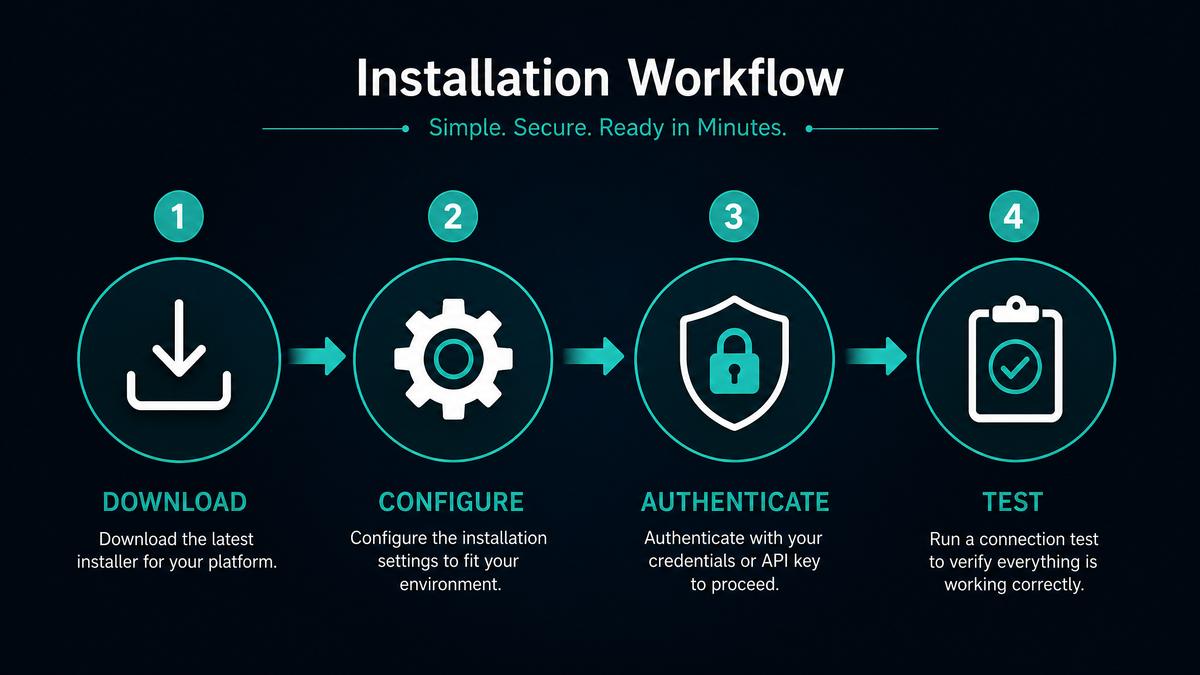
Installing Codex CLI: npm vs Cargo Methods
Codex CLI offers two primary installation methods, catering to different developer preferences: npm (Node.js package manager) and Cargo (Rust package manager). Both yield identical functionality but differ in setup complexity and update cadence.
Installation via npm
npm is ideal if you already use Node.js for your development stack. The Codex CLI is distributed as a global package.
npm install -g @openai/codex-cli
Verify the installation:
codex --version
Expected output:
codex-cli v1.4.2
Installation via Cargo
For Rust enthusiasts or developers wanting a minimal Node.js footprint, Cargo provides a native binary build:
cargo install codex-cli
Ensure Cargo’s bin directory is in your PATH. Check installation:
codex --version
Comparative Overview
| Criterion | npm Installation | Cargo Installation |
|---|---|---|
| Installation Speed | Fast (prebuilt binaries) | Slower (compiles from source) |
| Update Frequency | Frequent, easy to update via npm | Stable releases, manual update |
| Binary Size | Larger (Node.js runtime included) | Smaller, native binary |
| Platform Compatibility | Cross-platform with Node.js | Native support but requires Rust toolchain |
Practical Tip
If you want the quickest setup on Windows without WSL, npm installation is recommended. Linux and macOS users desiring a lightweight binary should prefer Cargo.
Configuring Your OpenAI API Key for Codex CLI
Codex CLI requires authentication via an API key to interact with OpenAI services. This section details secure API key management and environment setup.
Obtaining Your API Key
- Sign in to the OpenAI API Keys Dashboard.
- Generate a new secret key with appropriate model access permissions.
- Copy the key and store it securely.
Setting Environment Variables
For security and convenience, set the API key as an environment variable:
# Bash/macOS/Linux
export OPENAI_API_KEY="sk-xxxxxxxxxxxxxxxxxxxxxxxxxxxxxxxxxx"
:: PowerShell (Windows)
$env:OPENAI_API_KEY="sk-xxxxxxxxxxxxxxxxxxxxxxxxxxxxxxxxxx"
Alternatively, you can create a .env file in your project root:
OPENAI_API_KEY=sk-xxxxxxxxxxxxxxxxxxxxxxxxxxxxxxxxxx
Codex CLI automatically loads environment variables from .env if present.
Verifying API Key Setup
Run the following command to verify connectivity:
codex api test
Expected output:
✅ API key is valid and connection established.
Model: codex-2026-01
Security Best Practices
- Never hardcode your API key in source code.
- Use .gitignore to exclude
.envfiles from version control. - Rotate API keys periodically.
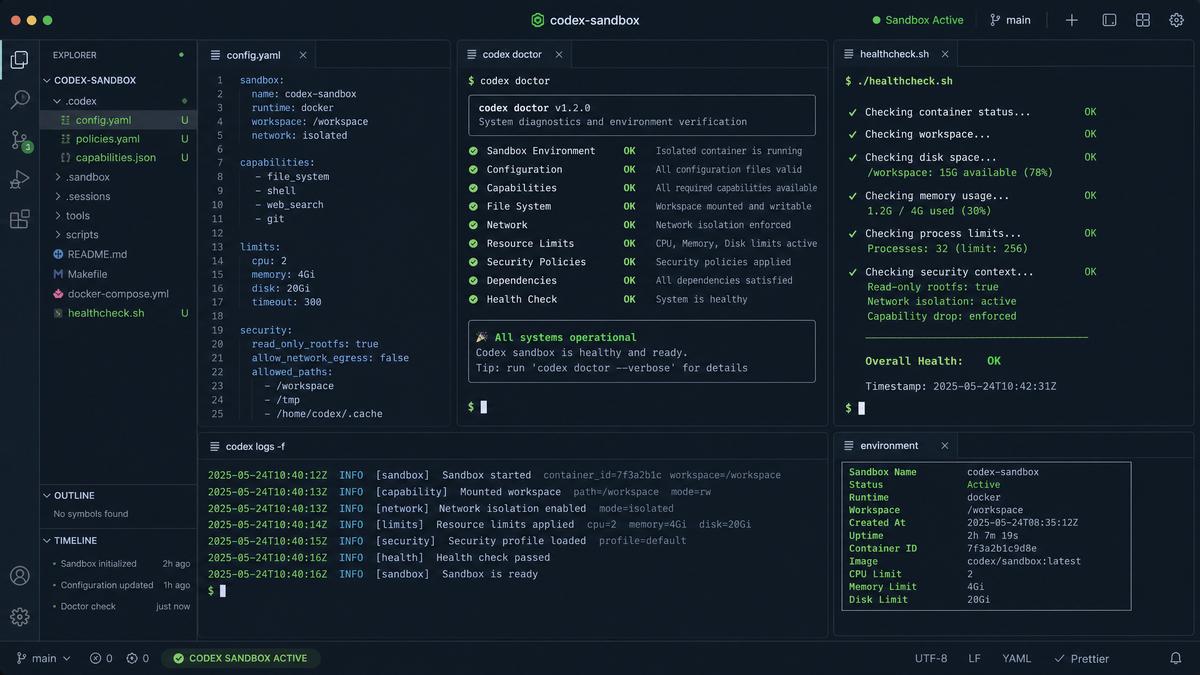
Setting Up the Codex CLI Sandbox Environment
The sandbox environment isolates Codex CLI operations, enabling safe experimentation without affecting your main projects. This section explains sandbox creation, directory structure, and configuration.
Creating the Sandbox Directory
mkdir ~/codex-sandbox
cd ~/codex-sandbox
codex init
The codex init command scaffolds the sandbox with default configuration files:
codex.config.json– CLI settingsmemory.sqlite– SQLite database for persistent memorysandbox.log– Activity logging
Understanding the Configuration File
{
  "apiKeyEnvVar": "OPENAI_API_KEY",
  "model": "codex-2026-01",
  "memory": {
    "enabled": true,
    "storage": "sqlite",
    "path": "memory.sqlite"
  },
  "sandboxMode": true,
  "logging": {
    "level": "info",
    "file": "sandbox.log"
  }
}
This JSON structure configures API access, memory persistence, sandbox isolation, and logging verbosity.
Launching the Sandbox
Start an interactive Codex session within the sandbox:
codex shell
Prompt changes to codex-sandbox> indicate you are within the sandbox. All commands executed here remain isolated.
Practical Sandbox Tips
- Use sandbox mode to test new Codex features or scripts before integrating into your main workflow.
- Reset sandbox state with
codex reset --sandboxto clear memory and logs. - Configure sandbox logging to debug unexpected behavior.
Building Your First Project with Codex CLI
Now that the environment is ready, let’s create a simple project to demonstrate Codex CLI’s capabilities: generating a REST API endpoint in Node.js.
Step 1: Initialize Project Directory
mkdir my-codex-api
cd my-codex-api
codex init
This sets up the Codex CLI configuration in the project folder.
Step 2: Generate API Boilerplate
Use Codex to generate an Express.js REST API scaffold:
codex generate "Create an Express.js REST API with one endpoint '/hello' that returns JSON { message: 'Hello, World!' }"
Expected output:
✔ Generated file: index.js
✔ Generated file: package.json
Step 3: Review and Install Dependencies
Inspect package.json and index.js to understand the generated code:
cat index.js
const express = require('express');
const app = express();
const port = 3000;

app.get('/hello', (req, res) => {
  res.json({ message: 'Hello, World!' });
});

app.listen(port, () => {
  console.log(`API listening at http://localhost:${port}`);
});
Install dependencies:
npm install
Step 4: Run the API Server
node index.js
Expected terminal output:
API listening at http://localhost:3000
Step 5: Test the Endpoint
Use curl or HTTP client:
curl http://localhost:3000/hello
Expected response:
{
  "message": "Hello, World!"
}
Practical Tip
Leverage Codex CLI’s interactive shell for iterative code improvements with commands like:
codex edit index.js --prompt "Add error handling for unknown routes"
This increases productivity by integrating AI-driven coding assistance seamlessly.
Diagnosing Issues with codex doctor
Encountering problems? The codex doctor command is your diagnostic companion, analyzing environment, configuration, and API connectivity.
Running the Diagnostic Tool
codex doctor
Sample output:
Running Codex CLI diagnostics...

✅ Node.js version: 18.12.1
✅ Rustc version: 1.72.0
✅ API key found: Yes
✅ API connectivity: Success (Ping: 120ms)
✅ SQLite available: Yes
✅ Sandbox directory: ~/codex-sandbox
✅ Memory persistence: Enabled
✅ Configuration file: Valid

No issues detected.
Common Warnings and Fixes
| Warning | Cause | Resolution |
|---|---|---|
| API key not found | Environment variable missing or misnamed | Set OPENAI_API_KEY correctly in your shell or .env |
| SQLite not installed | Persistent memory features unavailable | Install SQLite3 CLI and libraries; restart shell |
| Sandbox directory missing | Failed to locate sandbox folder | Run codex init --sandbox to recreate |
Advanced Diagnostics
Invoke verbose diagnostics with:
codex doctor --verbose
This outputs detailed logs useful for troubleshooting complex issues such as API throttling or configuration conflicts.
Understanding Codex CLI Memory and SQLite Integration
One standout feature of Codex CLI is its ability to maintain conversational memory and context across sessions using SQLite as backing storage. This section dives deep into how memory works and how to configure it.
Memory Architecture Overview
- Ephemeral Memory: Temporary context held during a single session.
- Persistent Memory: Stored in SQLite database for long-term context retention.
- Memory Segments: Codex divides memory into code snippets, user prompts, and system messages.
Enabling Persistent Memory
By default, persistent memory is enabled in the sandbox environment. To enable it in a standard project, add the following to codex.config.json:
{
  "memory": {
    "enabled": true,
    "storage": "sqlite",
    "path": "./memory.sqlite"
  }
}
Inspecting Memory Database
Use the SQLite CLI to query stored memory entries:
sqlite3 memory.sqlite
sqlite> .tables
memory_entries  metadata

sqlite> SELECT * FROM memory_entries LIMIT 5;
This helps audit what Codex retains and assists in debugging context-related behavior.
Memory Management Commands
codex memory list– Lists stored memory entries.codex memory prune --older-than 30d– Removes entries older than 30 days.codex memory clear– Clears all stored memory.
Performance Considerations
SQLite-backed memory offers fast read/write operations and scales well for most developer use cases. However, for extremely large projects, consider periodic pruning or migrating to advanced storage backends when available.
Advanced Configuration and Customization of Codex CLI
Codex CLI supports advanced user configurations to tailor AI behavior, resource usage, and integration with development workflows.
Custom Model Selection
Specify alternate Codex models in codex.config.json:
{
  "model": "codex-2026-02"
}
Use codex api models to list available models and their capabilities.
Timeout and Rate Limit Settings
Control API request timeouts and throttling:
{
  "api": {
    "timeoutMs": 15000,
    "rateLimitPerMinute": 60
  }
}
Adjust these values based on network conditions and API quotas.
Plugin and Extension Support
Codex CLI supports plugins to extend command sets. Install community plugins via npm or Cargo, then enable in configuration:
{
  "plugins": [
    "codex-plugin-linter",
    "codex-plugin-docgen"
  ]
}
Integrating with CI/CD Pipelines
Use Codex CLI non-interactively in build scripts:
codex generate "Write unit tests for src/calculator.js" --output tests/calculator.test.js
This automation accelerates test coverage and code quality enforcement.
Configuring Logging and Debugging
Modify logging verbosity for troubleshooting:
{
  "logging": {
    "level": "debug",
    "file": "/var/log/codex-cli.log"
  }
}
Use debug logs to trace API requests, memory operations, and internal decision-making.
Practical Tip: Environment Profiles
Create multiple configuration files (e.g., codex.config.dev.json and codex.config.prod.json) and switch by passing the --config flag to the CLI. This enables seamless context switching between development and production environments.
Troubleshooting and Optimization Strategies
Even with a robust setup, developers may encounter issues or want to optimize Codex CLI’s performance. This section provides actionable advice.
Common Issues and Resolutions
- Slow Response Times: Check network latency, increase
timeoutMs, or switch to a model with lower compute requirements. - API Quota Exhaustion: Monitor usage with
codex api usageand request quota increase from OpenAI if needed. - Memory Bloat: Prune stored memory regularly and disable persistent memory if unnecessary.
- Sandbox Isolation Errors: Verify sandbox directory permissions and reset using
codex reset --sandbox.
Performance Tuning Tips
- Enable caching for repeated prompts using
codex cache enable. - Use batch requests for generating multiple code snippets.
- Optimize prompt engineering to reduce token usage.
Monitoring and Logs
Regularly review logs for warnings or errors:
tail -f ~/codex-sandbox/sandbox.log
Automate alerts on error patterns using log monitoring tools like Logstash or Splunk integrated with Codex CLI logs.
Developer Community and Support
Engage with the Codex CLI community for shared tips and plugins. Visit forums and
For a deeper exploration of related concepts, our comprehensive article on How to Use CLI Coding Agents in 2026 — Claude Code, Codex, and Antigravity provides detailed analysis, practical examples, and expert recommendations that complement the strategies discussed in this section.
for discussions and troubleshooting.
Comparing Codex CLI with Other AI Coding Tools in 2026
To contextualize Codex CLI’s unique offerings, consider this comparison with popular AI coding assistants:
| Feature | OpenAI Codex CLI | GitHub Copilot CLI | TabNine CLI | Codeium CLI |
|---|---|---|---|---|
| Open Source | Yes | No | Partial | Yes |
| Model Customization | Extensive via config | Limited | Moderate | Moderate |
| Persistent Memory | SQLite-backed | No | Cache only | No |
| Plugin System | Yes | No | No | No |
| Multi-language Support | Wide (20+ languages) | Wide | Moderate | Wide |
| CLI Interactivity | Full shell mode | Limited | Limited | Limited |
Actionable Insight
Codex CLI’s open-source nature, persistent memory, and extensive customization make it the preferred tool for developers seeking full control over AI-assisted coding workflows. For more on AI coding tools, see
For a deeper exploration of related concepts, our comprehensive article on 7 Best AI Coding Agents for writing Compared u2014 Features, Pricing, Use Cases provides detailed analysis, practical examples, and expert recommendations that complement the strategies discussed in this section.
.
Advanced Configuration: Customizing Codex CLI for Optimal Performance
Beyond the basic setup, Codex CLI offers extensive configuration options that allow you to tailor its behavior for specific development environments and workflows. Understanding these settings can drastically improve both speed and accuracy of code generation, as well as resource management.
Config File Structure and Location
Codex CLI uses a JSON or YAML configuration file located at ~/.codexcli/config.json (or config.yaml) by default. You can override this path with the environment variable CODEX_CONFIG_PATH.
{
  "model": "codex-2026-xlarge",
  "temperature": 0.2,
  "max_tokens": 512,
  "memory": {
    "enabled": true,
    "type": "sqlite",
    "path": "~/.codexcli/memory.db"
  },
  "api": {
    "endpoint": "https://api.openai.com/v1/codex",
    "timeout": 60000
  },
  "logging": {
    "level": "info",
    "file": "~/.codexcli/logs/codexcli.log"
  }
}
Key Configuration Parameters Explained
- model: Choose Codex model variants (e.g.,
codex-2026-xlarge,codex-2026-fast) balancing accuracy and speed. - temperature: Controls randomness; lower values (0.1–0.3) for deterministic outputs, higher (0.7–1.0) for creative code snippets.
- max_tokens: Limits output length; adjust based on typical snippet complexity.
- memory.enabled: Enables persistent context memory for multi-turn coding sessions.
- memory.type: Selects backend;
sqliterecommended for durability,in-memoryfor ephemeral sessions. - api.timeout: Sets request timeout in milliseconds to avoid hanging calls.
- logging.level: Options include
debug,info,warn, anderror.
Practical Tip: Using Profiles for Different Projects
Developers often work on multiple projects with distinct coding standards and environments. Codex CLI supports multiple profiles by specifying separate config files and switching between them using the --profile flag.
codex --profile project-alpha generate "function to parse JSON"This approach maintains isolated contexts and API keys per project, avoiding contamination of memory or settings.
Integrating Codex CLI with Your Development Workflow
Proper integration of Codex CLI into your daily workflow can exponentially increase productivity. This section covers practical techniques to embed Codex CLI within common tools and editors.
Shell Aliases and Scripts
To reduce repetitive command typing, create shell aliases or scripts for frequent Codex CLI commands. For example, add the following to your .bashrc or .zshrc:
alias cgen='codex generate --temperature 0.2 --max_tokens 256'Now you can quickly generate code snippets by running cgen "sort array of integers" without typing verbose flags.
Editor Integration Using VSCode Tasks
Codex CLI can be integrated into VSCode via tasks to generate and insert code snippets directly into your editor.
{
  "version": "2.0.0",
  "tasks": [
    {
      "label": "Generate Codex Snippet",
      "type": "shell",
      "command": "codex generate --prompt '${input:prompt}' --max_tokens 256",
      "problemMatcher": [],
      "presentation": {
        "echo": true,
        "reveal": "always",
        "panel": "shared"
      }
    }
  ],
  "inputs": [
    {
      "id": "prompt",
      "type": "promptString",
      "description": "Describe the code snippet to generate"
    }
  ]
}
After running this task, the generated snippet will appear in the terminal panel, ready to be copied or piped into your source code file.
Automating with CI/CD Pipelines
Codex CLI can automate code generation and review tasks in Continuous Integration pipelines. For example, you can add a step in your GitHub Actions workflow to generate helper functions or refactor legacy code automatically:
jobs:
  codex_generate:
    runs-on: ubuntu-latest
    steps:
      - uses: actions/checkout@v3
      - name: Set up Node.js
        uses: actions/setup-node@v3
        with:
          node-version: 18
      - name: Install Codex CLI
        run: npm install -g @openai/codexcli
      - name: Generate Code Snippet
        run: codex generate "function to validate email addresses" --output utils/validateEmail.js
        env:
          OPENAI_API_KEY: ${{ secrets.OPENAI_API_KEY }}
This integration enables consistent code quality and adherence to organizational standards.
Deep Dive: Memory Persistence and SQLite Integration
One of the most powerful features of Codex CLI is its ability to maintain conversational context and session memory across invocations. This is critical for complex coding sessions where incremental changes and multi-turn interactions improve code quality.
How Memory Persistence Works
When enabled, Codex CLI stores interaction history including prompts, generated outputs, and user feedback in a persistent backend. On subsequent runs, this memory is loaded to provide context, enabling the model to generate more coherent and relevant code.
SQLite Backend Configuration
SQLite is the default recommended backend for memory persistence due to its lightweight footprint and ACID compliance. To enable it, ensure SQLite3 CLI tools are installed and configure your config.json as follows:
{
  "memory": {
    "enabled": true,
    "type": "sqlite",
    "path": "~/.codexcli/memory.db"
  }
}
The database schema is automatically created on first run, storing tables for sessions, prompts, responses, and metadata tags.
Example: Multi-Turn Coding Session with Memory
$ codex generate "write a function to calculate factorial in Python"
def factorial(n):
    if n == 0:
        return 1
    else:
        return n * factorial(n-1)

$ codex generate "now add memoization to optimize factorial function"
def factorial(n, memo={}):
    if n in memo:
        return memo[n]
    if n == 0:
        memo[n] = 1
    else:
        memo[n] = n * factorial(n-1, memo)
    return memo[n]
Because prior context is remembered, Codex CLI understands the follow-up prompt and refines the existing code instead of generating from scratch.
Comparison: In-Memory vs SQLite Memory
| Feature | In-Memory Memory | SQLite Memory |
|---|---|---|
| Persistence Across Sessions | No | Yes |
| Speed | Faster (RAM-based) | Moderate (disk I/O) |
| Durability | Volatile, lost on restart | Durable, stored permanently |
| Use Case | Short-lived, quick experiments | Long-term projects with incremental improvements |
Troubleshooting Common Issues and Diagnostic Commands
Despite its reliability, Codex CLI may encounter issues related to environment, API connectivity, or configuration errors. Familiarity with diagnostic commands and logs can expedite resolution.
Using codex doctor for System Health Checks
The codex doctor command performs a series of checks including runtime version verification, API key validation, network connectivity, and config file integrity.
$ codex doctor
[INFO] Node.js version: 18.16.0 (OK)
[INFO] Rust version: 1.70.0 (OK)
[INFO] SQLite3 detected at /usr/bin/sqlite3 (OK)
[INFO] OPENAI_API_KEY environment variable set (OK)
[INFO] API endpoint reachable (OK)
[WARN] Config file contains deprecated parameters
[INFO] Diagnostics complete with warnings
Warnings should be reviewed and corrected, such as updating deprecated config keys or renewing API keys.
Common Error Messages and Fixes
- 401 Unauthorized: Verify your OpenAI API key is correctly set in environment variables or config file.
- Timeout Errors: Check network stability and increase
api.timeoutin config. - SQLite Locking Errors: Ensure no concurrent processes are writing to the memory database and that file permissions allow access.
- Model Not Found: Confirm the model name in the config matches available Codex models for 2026.
Enabling Debug Logs for Deeper Insight
Set logging level to debug in config.json to capture detailed runtime information:
{
  "logging": {
    "level": "debug",
    "file": "~/.codexcli/logs/codexcli-debug.log"
  }
}
Inspect the generated logs when troubleshooting complex issues or unexpected behavior.
Comparing Installation Methods: npm vs Cargo
Codex CLI supports installation via both Node.js’s npm and Rust’s cargo package managers. Each method has unique advantages depending on your development environment and preferences.
| Aspect | npm Installation | Cargo Installation |
|---|---|---|
| Prerequisites | Node.js 18.x+, npm | Rust 1.70+, Cargo |
| Installation Command | npm install -g @openai/codexcli |
cargo install codexcli |
| Binary Location | System npm global bin directory | Rust cargo bin directory (~/.cargo/bin) |
| Update Frequency | Depends on npm registry updates | Often quicker with direct GitHub releases |
| Performance | Good for cross-platform compatibility | Generally faster execution and smaller binary |
| Customization | Limited to npm package version | Easier to build from source with feature flags |
Expert Recommendation
If your development environment is primarily JavaScript/Node.js based, npm installation offers seamless integration and easier updates. For Rust enthusiasts or those requiring maximum performance and customization, cargo installation is preferable. Both methods support identical functionality.
Real-World Use Cases and Expert Workflows
Understanding how leading developers leverage Codex CLI in production environments can provide valuable insights to optimize your own usage.
Use Case 1: Legacy Code Refactoring at Scale
One enterprise software team used Codex CLI’s batch generation and memory features to refactor thousands of legacy functions across multiple repositories. By scripting Codex CLI commands with custom prompts, they automated conversion from deprecated APIs to modern equivalents, reducing manual effort by 70%.
for file in $(git ls-files '*.js'); do
  codex generate "refactor deprecated API calls in $file" --input $file --output $file
done
Use Case 2: Interactive Pair Programming Assistant
Developers employ Codex CLI as a terminal-based pair programmer, prompting for code snippets, documentation, or bug fixes interactively during coding sessions. Persistent memory enables contextual follow-ups, making the AI a dynamic collaborator rather than a static generator.
Use Case 3: Automated Test Generation
Quality assurance teams utilize Codex CLI to generate unit and integration tests from function signatures, improving test coverage with minimal manual input. This can be scripted as part of the build process to generate or update test files automatically.
Professional Tips for Maximizing Productivity
- Combine Codex CLI with version control hooks (e.g., pre-commit) to enforce AI-generated code standards.
- Leverage the
--temperatureflag to adjust creativity for exploratory coding versus production-ready code. - Use memory persistence selectively; disable it for one-off snippets to avoid context pollution.
- Regularly update Codex CLI to leverage performance improvements and new features introduced in 2026.
Security Best Practices for Codex CLI Usage
Handling API keys, data privacy, and secure environment management is critical when using Codex CLI in professional settings.
Secure API Key Management
Never hardcode your OpenAI API key in scripts or config files that may be checked into version control. Use environment variables or secret managers supported by your OS or CI/CD platform.
export OPENAI_API_KEY="sk-xxxxxxxxxxxxxxxxxxxx"
Sandbox and Network Restrictions
For sensitive projects, configure Codex CLI to operate within isolated network environments or sandboxed containers to limit exposure of source code and API keys.
Data Privacy Considerations
Be aware that prompts and code snippets sent to OpenAI’s API may be stored and used for model training unless explicitly disabled. For proprietary or confidential code, review OpenAI’s data usage policies and consider using on-premises Codex deployments if available.
Audit and Logging
Enable detailed logging with appropriate access controls to track Codex CLI usage, identify anomalies, and comply with organizational security policies.
Internal Reference
For more on securing API keys and environment variables, refer to
For a deeper exploration of related concepts, our comprehensive article on **Topic:**
“Mastering Custom GPTs: How Developers Can Build and Deploy Tailored AI Assistants Using OpenAI’s Latest API Features”
**Why it’s trending/high-value:**
With OpenAI’s recent rollout of customizable GPT models, developers now have unprecedented control to create AI assistants fine-tuned for specific industries, workflows, or user needs. This tutorial/news article would dive deep into the step-by-step process of leveraging these new API capabilities, showcasing practical use cases, optimization techniques, and deployment best practices. It addresses the growing developer demand to move beyond generic AI and build specialized, high-performance conversational agents—making it a must-read for the chatgptaihub.com audience eager to stay ahead in the AI app development space. provides detailed analysis, practical examples, and expert recommendations that complement the strategies discussed in this section.
.
Access 40,000+ AI Prompts for ChatGPT, Claude & Codex — Free!
Subscribe to get instant access to our complete Notion Prompt Library — the largest curated collection of prompts for ChatGPT, Claude, OpenAI Codex, and other leading AI models. Optimized for real-world workflows across coding, research, content creation, and business.
Conclusion: Mastering Codex CLI for Future-Ready Development
Setting up and mastering Codex CLI on your local machine unlocks powerful AI-driven coding capabilities, streamlining everything from boilerplate generation to complex code refactoring. This tutorial has walked you through every essential step—from prerequisites and installation to advanced configuration and troubleshooting—equipping you to harness Codex CLI’s full potential in 2026 and beyond.
By leveraging sandbox environments, persistent memory with SQLite, and diagnostic tools like codex doctor, you gain a resilient and adaptable coding assistant integrated seamlessly into your development workflow. Whether you install via npm or Cargo, the flexibility and depth of Codex CLI cater to diverse preferences and project requirements.
Continue exploring advanced features, contribute to the open-source ecosystem, and integrate Codex CLI into your CI/CD pipelines for maximum productivity gains. For detailed guides on related topics, don’t miss
For a deeper exploration of related concepts, our comprehensive article on Mastering Codex Goal Mode: Advanced Prompting for Multi-Day Autonomous AI Agents provides detailed analysis, practical examples, and expert recommendations that complement the strategies discussed in this section.
and
For a deeper exploration of related concepts, our comprehensive article on Running AI Coding Agents Safely: Enterprise Security Best Practices for Codex provides detailed analysis, practical examples, and expert recommendations that complement the strategies discussed in this section.
.
Embrace Codex CLI as your AI coding partner and revolutionize the way you build software.